squid3 logo
Squid3 proxy server is the subject of this post, along this writing I am going to show you how to install and configure this proxy server. For more information you can visit this URL; the official website of the project. My system is a Debian jessie 8.
This post is part of a bigger Linux and Debian basic administration material that you can access here. I have also described a squid 2.7 working configuration here. Squid 2.7 is a bit different from squid3 but they are configured basically the same way except for a few new directives and some other changes and deprecations. Let’s play then.
Installing squid3 is simple:
root@khs01wxl001:/home/abel# aptitude install squid3
The following NEW packages will be installed:
libecap2{a} squid-langpack{a} squid3 squid3-common{a}
0 packages upgraded, 4 newly installed, 0 to remove and 380 not upgraded.
Need to get 2,459 kB of archives. After unpacking 8,570 kB will be used.
Do you want to continue? [Y/n/?] Y
Get: 1 http://http.us.debian.org/debian/ testing/main squid-langpack all 20121005-1 [333 kB]
Get: 2 http://http.us.debian.org/debian/ testing/main libecap2 amd64 0.2.0-1 [16.8 kB]
Get: 3 http://http.us.debian.org/debian/ testing/main squid3-common all 3.3.8-1.1 [245 kB]
Get: 4 http://http.us.debian.org/debian/ testing/main squid3 amd64 3.3.8-1.1+b1 [1,864 kB]
Fetched 2,459 kB in 2min 36s (15.8 kB/s)
Selecting previously unselected package squid-langpack.
(Reading database ... 247964 files and directories currently installed.)
Preparing to unpack .../squid-langpack_20121005-1_all.deb ...
Unpacking squid-langpack (20121005-1) ...
Selecting previously unselected package libecap2.
Preparing to unpack .../libecap2_0.2.0-1_amd64.deb ...
Unpacking libecap2 (0.2.0-1) ...
Selecting previously unselected package squid3-common.
Preparing to unpack .../squid3-common_3.3.8-1.1_all.deb ...
Unpacking squid3-common (3.3.8-1.1) ...
Selecting previously unselected package squid3.
Preparing to unpack .../squid3_3.3.8-1.1+b1_amd64.deb ...
Unpacking squid3 (3.3.8-1.1+b1) ...
Processing triggers for man-db (2.6.6-1) ...
Setting up squid-langpack (20121005-1) ...
Setting up libecap2 (0.2.0-1) ...
Setting up squid3-common (3.3.8-1.1) ...
Setting up squid3 (3.3.8-1.1+b1) ...
Creating Squid HTTP proxy 3.x spool directory structure
2014/05/13 16:00:25 kid1| Creating missing swap directories
2014/05/13 16:00:25 kid1| No cache_dir stores are configured.
insserv: warning: script 'chilli' missing LSB tags and overrides
[ ok ] Restarting Squid HTTP Proxy 3.x: squid3.
Processing triggers for libc-bin (2.18-4) ...
root@khs01wxl001:/home/abel#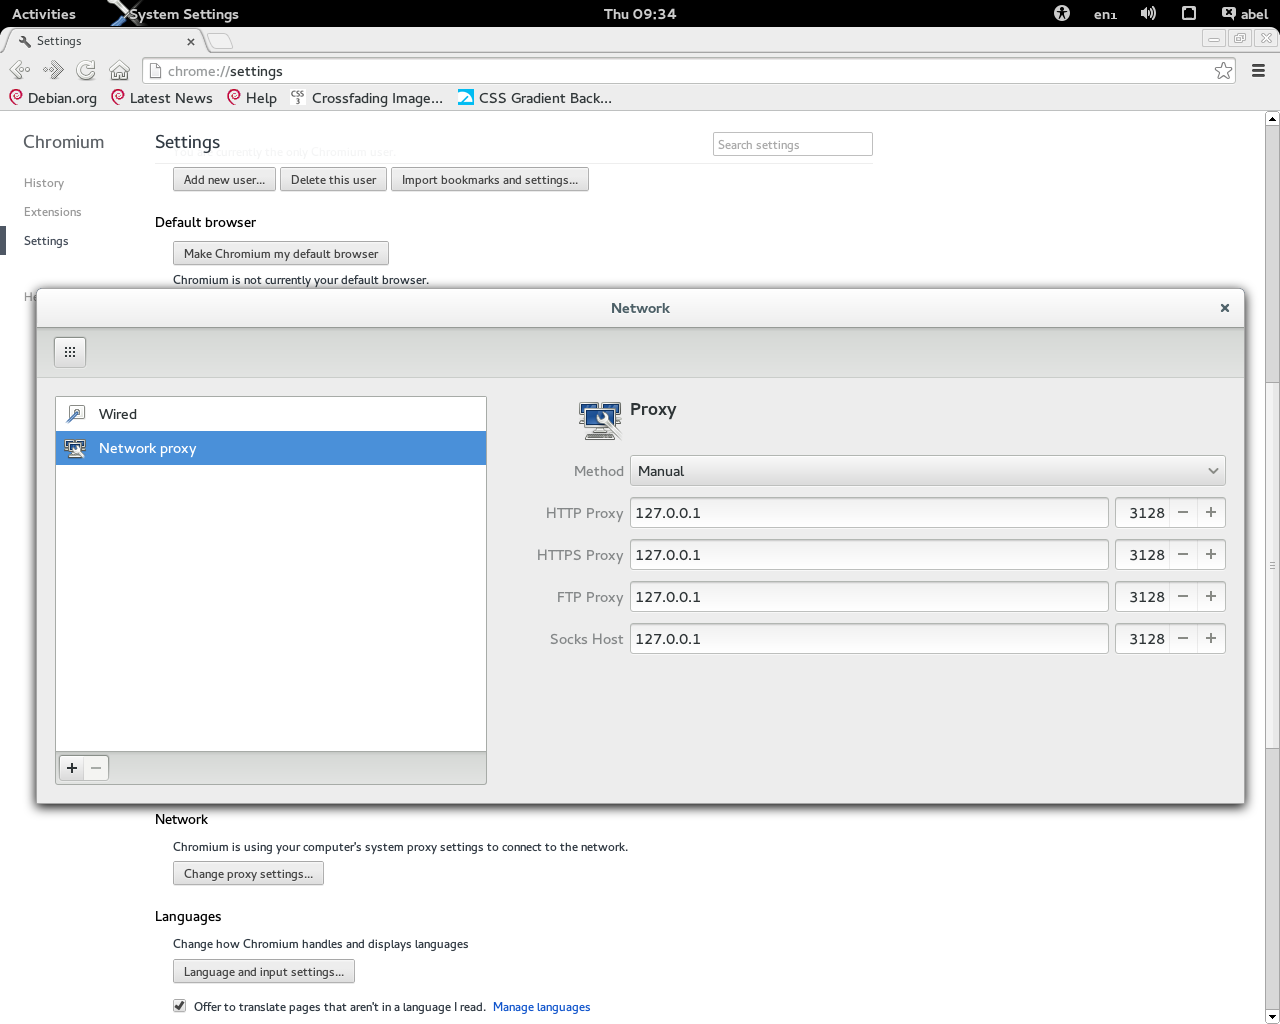
Proxy configuration client side
If you have any other Debian based system like Ubuntu, Debian 6 or 7 or older the version of squid is 2.xx. The only difference could be that you should not add the 3 at the end of the “aptitude install squid3”, but “aptitude install squid only”. If your system is something like red hat or Suse Linux, they have their own package manager. And you should find the way to install it the rest of the procedure should be very similar. Check the picture to see my configuration.
After installing we need to configure the proxy server. But let me tell you that the default configuration of squid is fully functional. It can apply its own default rules to any request in the port 3128 where it listens by default. Lets try; start by configuring your computer to use your own server fleshly installed IP address and port 3128 as proxy.
Also as the service is running already you can easily restarting like any other service.
Restarting squid3
root@khs01wxl001:/home/abel# service squid3 restart
[ ok ] Restarting Squid HTTP Proxy 3.x: squid3[....]  Waiting.....................done.
. ok
root@khs01wxl001:/home/abel#
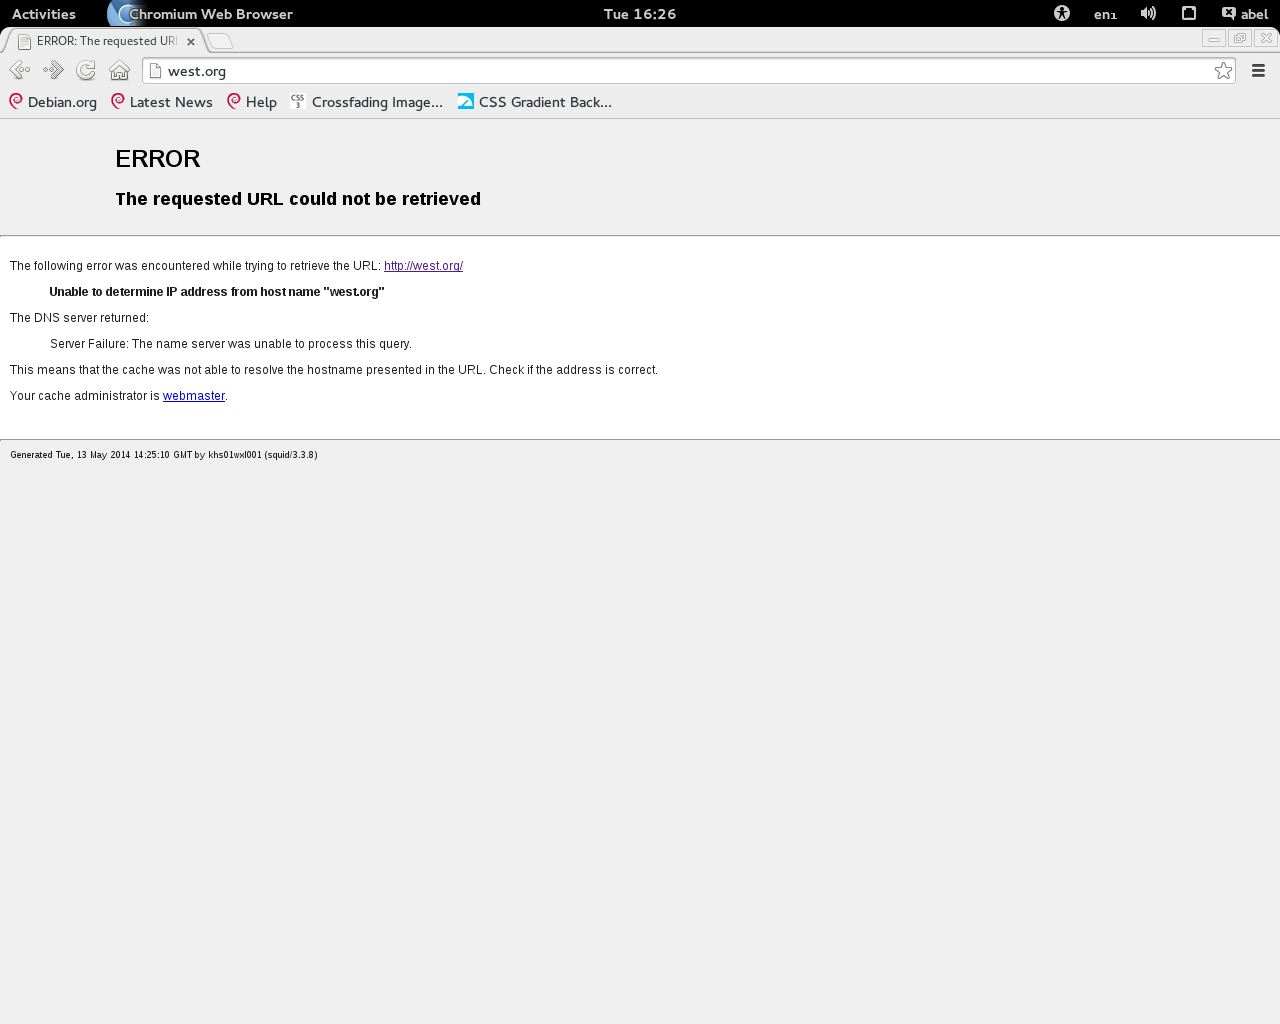
Squid3 error page
If you are not behind a proxy server you should be able to go to the websites from the localhost. I mean using the localhost as your proxy server. I am behind a proxy server so the default configuration does not let me out to Internet, but only to the local network websites. Check out the picture. As you see we have an error message that says i cant go to that website because of a DNS error, you could have something similar if you are behind a proxy.
Now we have the proxy installed and is screaming configure me, configure me… So let’s do that. But first let’s try to access the same website that we can access from our local host from an other computer. If you try that you should receive an access denied message. That means that squid3 by default come with a configuration that allows that localhost but not the rest of the computers to access Internet. Well that is fine for one computer, but if you want people to access Internet through your network. Then we need to change that setting to allow them to go to Internet. For that squid a configuration file, you can find it in /etc/squid3/squid.conf. This file has a lot of things inside. The main reason to have it like that is that this file is also a manual.
You can also know the version of squid that you are running by executing:
Version of squid3.
root@khs01wxl001:/home/abel# squid3 -v
Squid Cache: Version 3.3.8
configure options:  '--build=x86_64-linux-gnu' '--prefix=/usr' '--includedir=${prefix}/include' '--mandir=${prefix}/share/man' '--infodir=${prefix}/share/info' '--sysconfdir=/etc' '--localstatedir=/var' '--libexecdir=${prefix}/lib/squid3' '--srcdir=.' '--disable-maintainer-mode' '--disable-dependency-tracking' '--disable-silent-rules' '--datadir=/usr/share/squid3' '--sysconfdir=/etc/squid3' '--mandir=/usr/share/man' '--enable-inline' '--enable-async-io=8' '--enable-storeio=ufs,aufs,diskd,rock' '--enable-removal-policies=lru,heap' '--enable-delay-pools' '--enable-cache-digests' '--enable-underscores' '--enable-icap-client' '--enable-follow-x-forwarded-for' '--enable-auth-basic=DB,fake,getpwnam,LDAP,MSNT,MSNT-multi-domain,NCSA,NIS,PAM,POP3,RADIUS,SASL,SMB' '--enable-auth-digest=file,LDAP' '--enable-auth-negotiate=kerberos,wrapper' '--enable-auth-ntlm=fake,smb_lm' '--enable-external-acl-helpers=file_userip,kerberos_ldap_group,LDAP_group,session,SQL_session,unix_group,wbinfo_group' '--enable-url-rewrite-helpers=fake' '--enable-eui' '--enable-esi' '--enable-icmp' '--enable-zph-qos' '--enable-ecap' '--disable-translation' '--with-swapdir=/var/spool/squid3' '--with-logdir=/var/log/squid3' '--with-pidfile=/var/run/squid3.pid' '--with-filedescriptors=65536' '--with-large-files' '--with-default-user=proxy' '--enable-linux-netfilter' 'build_alias=x86_64-linux-gnu' 'CFLAGS=-g -O2 -fPIE -fstack-protector --param=ssp-buffer-size=4 -Wformat -Werror=format-security -Wall' 'LDFLAGS=-fPIE -pie -Wl,-z,relro -Wl,-z,now' 'CPPFLAGS=-D_FORTIFY_SOURCE=2' 'CXXFLAGS=-g -O2 -fPIE -fstack-protector --param=ssp-buffer-size=4 -Wformat -Werror=format-security'
root@khs01wxl001:/home/abel#
In the other hand I prefer clean configurations, so I am going to copy the actual non commented content of the file to a new file called squid.conf.noCom. Then I am going to move the original fine to a file called squid.conf.old and then I am going to copy squid.conf.noCom to a file called squid.conf and as soon as we restart or reload the squid the new clean file will be used.
abel# cat /etc/squid3/squid.conf | egrep -v "(^#.*|^$)" > /etc/squid3/squid.conf.noCom
abel# mv /etc/squid3/squid.conf /etc/squid3/squid.conf.old
abel# mv /etc/squid3/squid.conf.noCom /etc/squid3/squid.conf
Note: I have taken the code to copy the configuration to a clean file from here. It’s a regular expression, probably the subject for a future post as they are very powerful.
Now we can edit the new squid.conf file using our favorite text editor:
The squid3 config file by default is supposed to contain a recommended by the project creators minimal configuration lines and those are this ones:
acl SSL_ports port 443
acl Safe_ports port 80          # http
acl Safe_ports port 21          # ftp
acl Safe_ports port 443         # https
acl Safe_ports port 70          # gopher
acl Safe_ports port 210         # wais
acl Safe_ports port 1025-65535  # unregistered ports
acl Safe_ports port 280         # http-mgmt
acl Safe_ports port 488         # gss-http
acl Safe_ports port 591         # filemaker
acl Safe_ports port 777         # multiling http
acl CONNECT method CONNECT
http_access deny !Safe_ports
http_access deny CONNECT !SSL_ports
http_access allow localhost manager
http_access deny manager
http_access allow localhost
http_access deny all
http_port 3128
coredump_dir /var/spool/squid3
refresh_pattern ^ftp:           1440    20%     10080
refresh_pattern ^gopher:        1440    0%      1440
refresh_pattern -i (/cgi-bin/|\?) 0     0%      0
refresh_pattern .               0       20%     4320
Note: The lines might slightly vary from one squid version to another.
Now lets direct and add our own comments to this lines. The first section has a few ACLs:
acl SSL_ports port 443
acl Safe_ports port 80          # http
acl Safe_ports port 21          # ftp
acl Safe_ports port 443         # https
acl Safe_ports port 70          # gopher
acl Safe_ports port 210         # wais
acl Safe_ports port 1025-65535  # unregistered ports
acl Safe_ports port 280         # http-mgmt
acl Safe_ports port 488         # gss-http
acl Safe_ports port 591         # filemaker
acl Safe_ports port 777         # multiling http
acl CONNECT method CONNECT
Note: ACL means access control lists. They are rules that group different client requests based on diverse criteria. For instance; IP address of the client, destination IP, URLs, regular expressions, date and time, etc. We will learn a lot about them along this material. They are one of the main features of squid. Also is important to notice that they do not deny or restrict access in squid directly. They just group requests. Squid has a special construction “http_access” for allowing or denying access to ACLs, we will see it soon. the sintax of an ACL is simple; acl + <name of the acl> + <type of acl> + <grouping parameter>.
- acl says that you are declaring and access control list.
- Name is any custom name.
- type of acl defines how are you going to group; for instance the type “src” groups by source host doing requests, or “dstdomain” by destination domain in the request.
- Then the grouping parameter says the domain of that type of request. For instance if your type is src. The grouping parameter could be and IP address or a whole network define by the netmask e.g.: 10.175.0.0/16
The listed ACL subsection has a few acls that. It defines the ports that squid3 should consider as safe ports by default. If you want to add or remove any of this ACLs it’s fine, but you should know that this ports are the most commonly used in INTERNET by web providers.
There is also an ACL for method CONNECT. CONNECT is like GET or POST, just a connection method for proxies according to this. This is ACL groups all the requests the use that method . So it’s advisable to leave this section as it is for now. Unless you know what you are changing. Here we can add at the beginning a comment saying something like:
#ACL section
#Safe port subsection
acl SSL_ports port 443
acl Safe_ports port 80 # http
...
We are done with this. Let’s go to the the next section. The next section is the one that says how are we going to apply the ACL rules. let start by adding the comment immediately after the ACL CONNECT line I would add somethin like:
...
acl CONNECT method CONNECT

# Allow or deny access to ACLs
http_access deny !Safe_ports
...
This is section has a few lines that allow or deny access to different things. let’s put them in black and white. The line that says “http_access deny !Safe_ports” means deny requests that are not “Safe_ports” if we go back to the last section Safe_ports are all the ports that are considered safe. In other word, if you are going to a safe port you do not match this rule. The “!” sign means “not”.
Before I continue explaining rules let me tell you a few facts about how squid matches rules:
- Squid goes trough the rules in the order they appear in the configuration.
- If you match one rule squid is done with you and applies to you what ever that rule say he should do with you.
- The last rule should always deny all to make squid more secure.
- The order of the rules matter a lot, because if you match the first rule you will never go to the second or any other rule.
Now lets continue with the next rule. “http_access deny CONNECT !SSL_ports” this rule means. Deny access if is “CONNECT” and not “SSL_ports” at the same time. Where “CONNECT” is the method that we have talk about before and “SSL_ports” refers to the 443 por ACL that appears as the first in my configuration file. I am not going to continue explaining one by one, I am just going to describe the syntax now as I think is simpler it is something like this: http_access <[deny] xor [allow]> [!]<acl name 1> [!]<acl name 2> … [!][acl name n]. For who is not familiar with this notation:
- <> means what ever is inside is mandatory.
- [] means what ever is inside could or could not be there.
- ! means “not”
- “xor” means exclusive “or”, in other word or deny or allow, but not both of them at the same time.
- The relationship between acls (e.g: <acl name 1> <acl name 2>) is the clasic “and” from programming; for who is not familiar with programming it means that all the conditions have to be fulfilled.
As you can the the syntax for giving or denying access is quite flexible, so you can create different kind or rules with it.
We have also and other section, I’ll call it: ports and is one of the shortest for now it has only one line, se it with the commet added already:
# Ports
http_port 3128
“http_port” is the reserved word to define the port that the clients are supposed to use to contact your server. You can change it to something different if you want. Remember the client configuration picture at the beginning? Well this line defines the port to use. You can change it to what ever you want always that this port is not in use in your host.
The the next section I will say it’s “chroot dir” as is also the only content it has for now, maybe in the future we will change that name
#chroot dir
coredump_dir /var/spool/squid3
Core dump dir is defined as:
By default Squid leaves core files in the directory from where it was started. If you set ‘coredump_dir’ to a directory that exists, Squid will chdir() to that directory at startup and coredump files will be left there.\
Taken from: http://www.squid-cache.org/Doc/config/coredump_dir/ on 2014-05-16.
The rest will be called “cache refresh pasterns”:
#Cache Refresh patterns
refresh_pattern ^ftp: 1440 20% 10080
I am not going to go deep in to it as they are a very powerful tool to be taken lightly. I prefer to leave this material as it is and then create a future post dedicated to refresh patterns.
Now let actually change something simple. lets allow every one in the network go to Internet trough our proxy. If you are behind an other proxy this material is not going to go to Internet. To achieve that you have to use your network proxy as sibling, probably as parent proxy. well let modify starting by the acl section. We will add an ACL that we’ll call “local-Network”. In my case it will group all the requests that come from my LAN (10.175.0.0/23). The ACL section modified should be something like this:
#ACL section
#My ACLs
acl local-Network src 10.175.0.0/23 # My lan Network
#Safe port subsection
acl SSL_ports port 443
Here I am just declaring an ACL using the type src, that means source client ip address that generates a request. read more about ACLs here. Now we have said that we have a group called “local-Network”. That ACL is supposed to group all the IP addresses that are part of the network 10.175.0.0/23 (my network). but we have to say somewhere that we allow or deny that network. that we can do it at the “Allow or deny access to ACLs” section right after the ACL section. To do that add the line “http_access allow local-Network”. Add it before the deny all rule “http_access deny all”. Remember that the order is very important for squid. your final file should be something like this:
#ACL section
#My ACLs
acl local-Network src 10.175.0.0/23 # My lan Network
#Safe port subsection
acl SSL_ports port 443
acl Safe_ports port 80          # http
acl Safe_ports port 21          # ftp
acl Safe_ports port 443         # https
acl Safe_ports port 70          # gopher
acl Safe_ports port 210         # wais
acl Safe_ports port 1025-65535  # unregistered ports
acl Safe_ports port 280         # http-mgmt
acl Safe_ports port 488         # gss-http
acl Safe_ports port 591         # filemaker
acl Safe_ports port 777         # multiling http
acl CONNECT method CONNECT

# Allow or deny access to ACLs
http_access deny !Safe_ports
http_access deny CONNECT !SSL_ports
http_access allow localhost manager
http_access deny manager
http_access allow localhost
#allow local net
http_access allow local-Network
http_access deny all

# Ports
http_port 3128
#Misc
#chroot dir
coredump_dir /var/spool/squid3

#Cache Refresh paterns
refresh_pattern ^ftp:           1440    20%     10080
refresh_pattern ^gopher:        1440    0%      1440
refresh_pattern -i (/cgi-bin/|\?) 0     0%      0
refresh_pattern .               0       20%     4320
Then now is time to test what we have done. To do that we have to do two things. Restart or reload the service. And configure a client browser in our network to use the squid server:
root@khs01wxl001:/home/abel# service squid3 restart
[ ok ] Restarting Squid HTTP Proxy 3.x: squid3[….] Waiting…………………done.
. ok
root@khs01wxl001:/home/abel#
Closing up
If every thing went fine you have it done. You can test changing your ip address to anything out of the range of your “local-Network” acl and the proxy will give you an access denied message. For more details on a working configuration you can go here.
This is it for today, the next post will be about how to modify squid3 a little bit more to create special hosts in our network and give different access privileges to different people.
Cheers